Cable Organizers
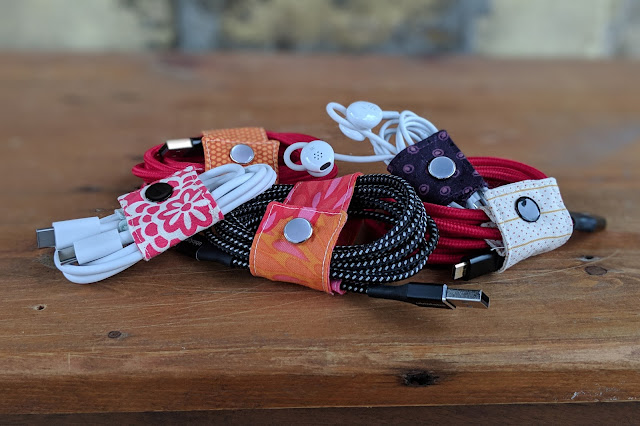
I try to keep phone charging cables in all my bags, and these cable organizers are great for keeping them tidy. They attach to your cables so they don't get lost when the cables are in use. When you're done with your cable, just coil it up, loop the fabric around, and snap it shut.
Plus, they're a great way to use up small scraps of fabric. If, like me, you hate getting rid of even a tiny piece of a print you love, you can sew together multiple pieces of coordinating fabric to make one cable organizer.
Materials:
- scraps of fabric, total two pieces about 2" (50 mm) by 7-10" (175-250 mm)
- a snap, velcro, or other fastener
- thread
Equipment:
- scissors or cutting mat and rotary cutter
- sewing machine with regular and buttonhole foot
- iron and ironing board
- snap setter if using snaps
- tape measure
Steps:
1. Coil up your cable and measure around where you want the cable organizer to go. For this tutorial, I'm going to make a cable organizer that goes all the way around my loop of cable, so the distance I'll be using is 4" (about 100 mm).


2. Add 4 inches (100 mm) to the length you measured in step 1, and cut out two rectangles of fabric this length by 2 inches (50 mm) wide. Mine is 8" by 2".

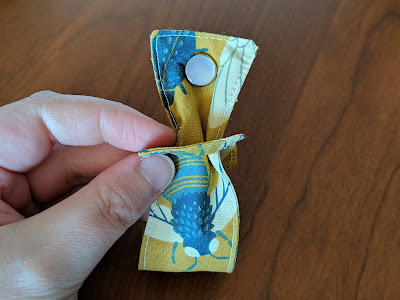
3. Cut a semicircle out of each side of your rectangles, with the centre located 2 inches (50 mm) from one of the ends. I traced a Canadian dime, which is about 3/4" (roughly 20 mm) in diameter.

4. Holding both pieces with right sides together, sew around with 3/8" (roughly 10 mm) seam allowance, leaving a small gap for turning it right side out.

5. Clip the corners and curves.


6. Turn inside out and press. Sew the gap shut, then top stitch the rest of the way around.

7. Add a buttonhole to the end with the semicircles as shown. I put a Canadian dime in my buttonhole foot (where you would normally put your button). You want the buttonhole to be about the size of the smallest distance between the notches. Roughly centre it in the space, but don't worry about it too much- once it's on the cable, you won't notice if it's off a little. Cut open the buttonhole, being careful not to snip any of the threads.

8. Add snaps according to the instructions that come with them. Position the top one near the end opposite the button hole, and the bottom one near the semicircular cutouts, so that the distance between the snaps is the length you measured in step 1. Make sure that you have the snaps installed on the correct sides of the cable organizer: you want the parts of the snap that touch each other when the snap is closed to be on opposite sides of the fabric. If you're using velcro make sure that the two halves of the velcro are on opposite sides of the fabric. You could also use a button near the semicircular cutouts, and another buttonhole on the opposite end.

9. To install the cable organizer on your cable, first put the opposite end into the buttonhole and pull through.


This leaves you with a loop to insert your cable.


Pull it tight around the cable. When your cable is in use, the organizer can stay attached.

When you're done using the cable, coil it up, wrap the strap around, and snap it shut!


Comments
Post a Comment